Daniel the Deer Lunch Bag Tutorial
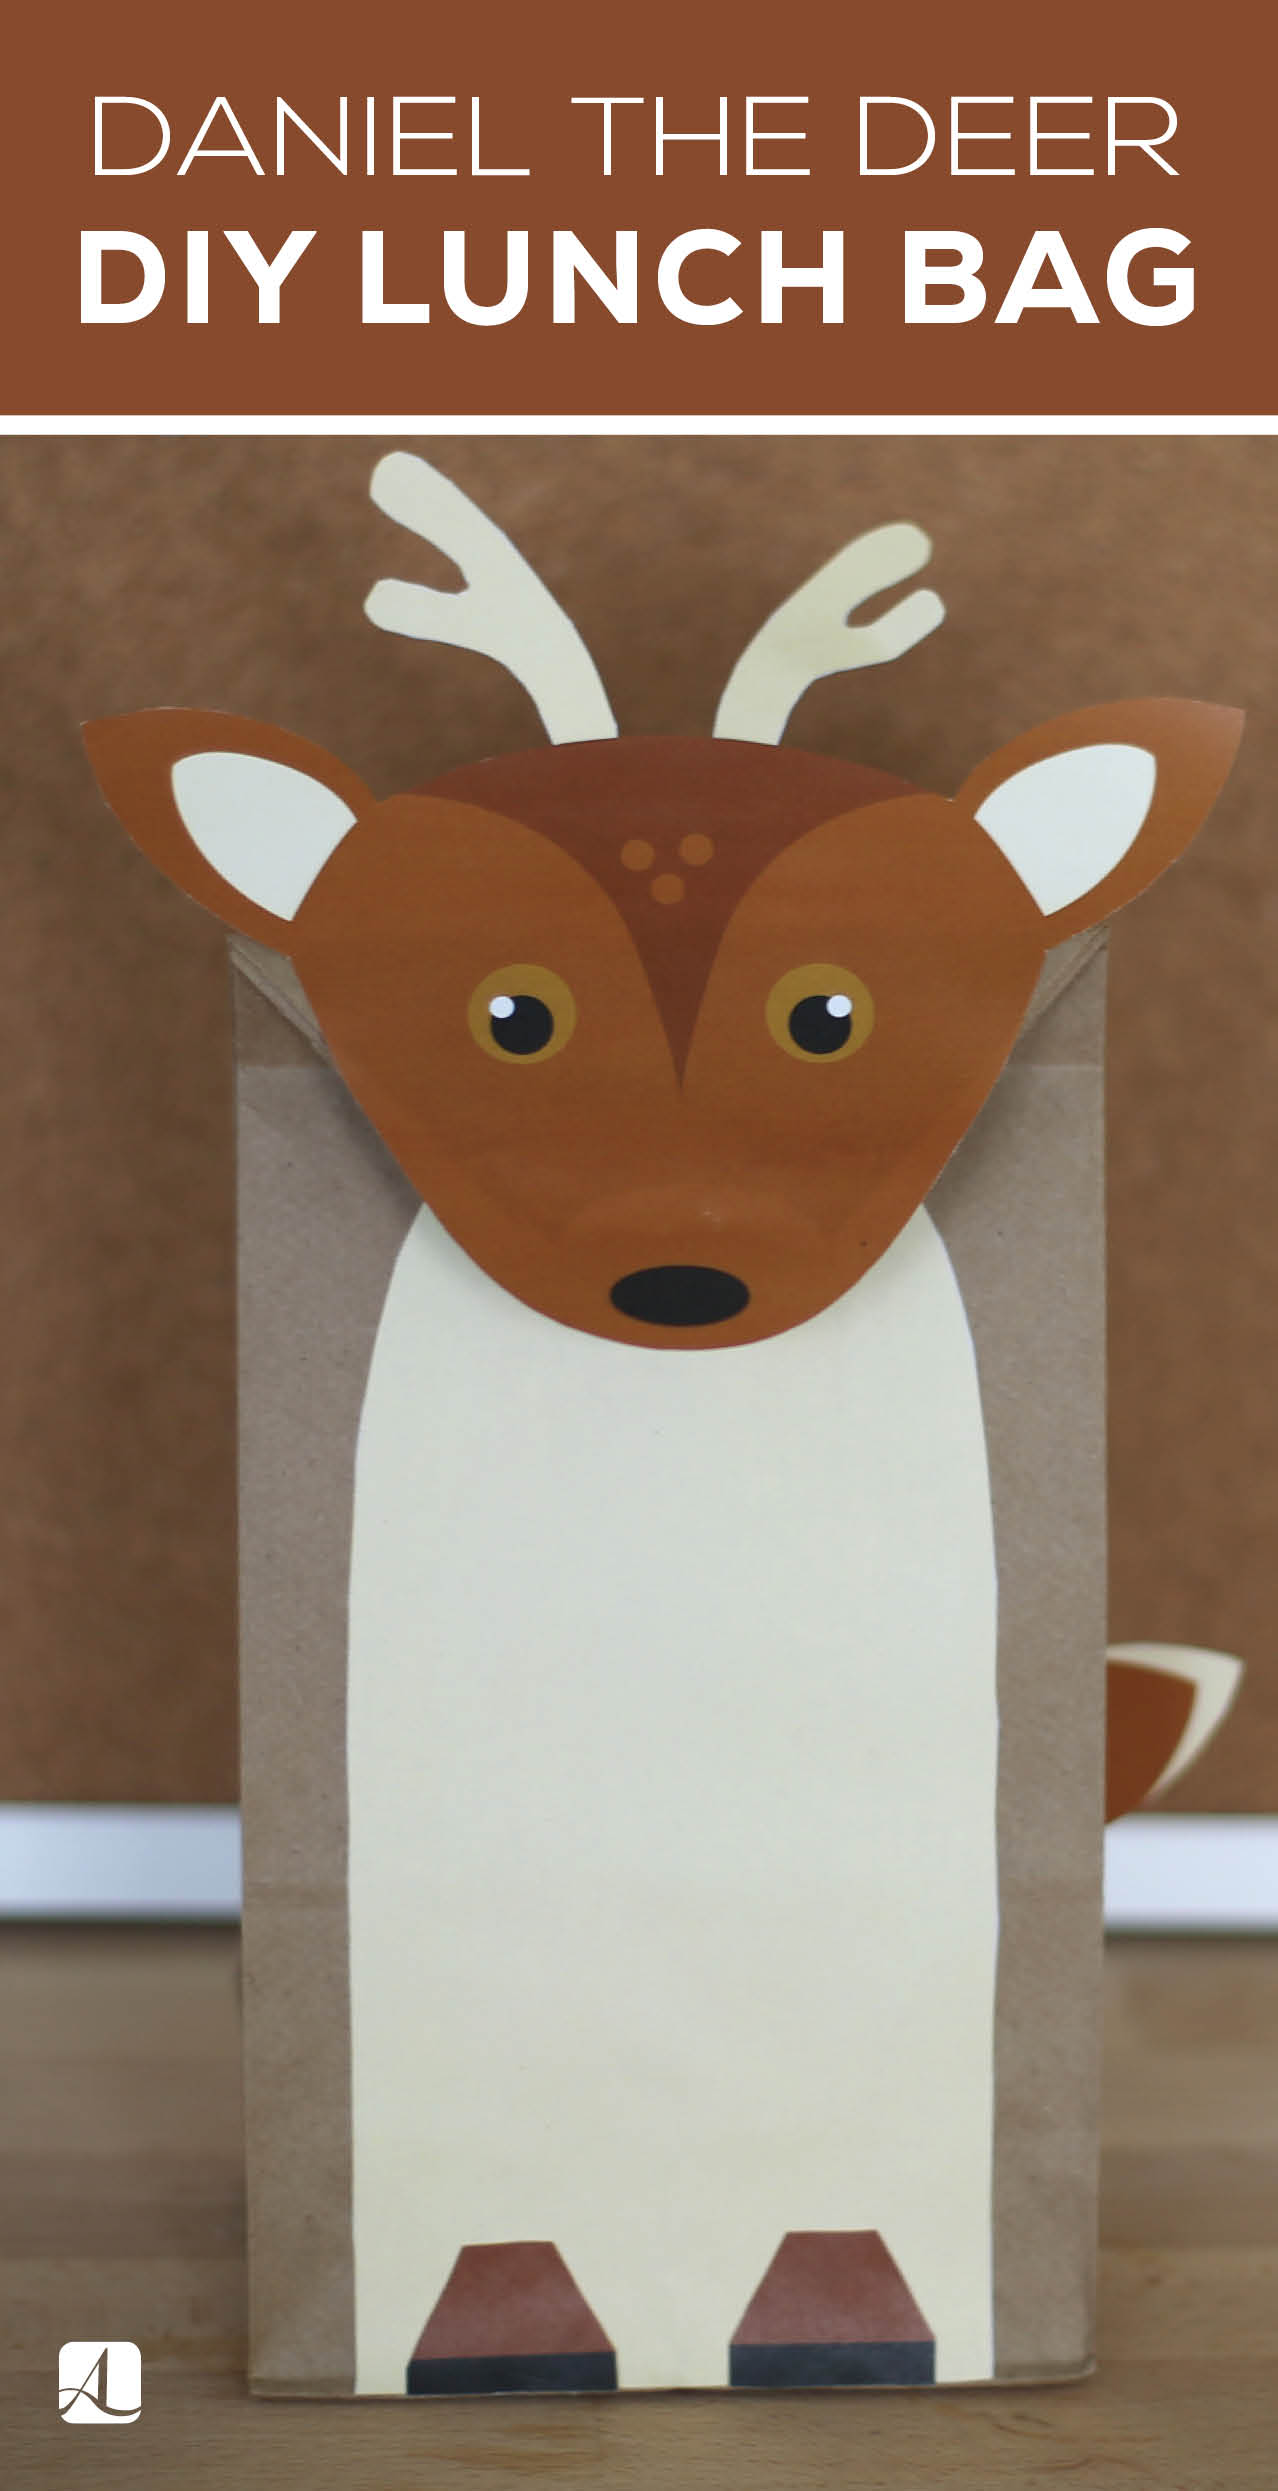
If the brown paper bag is your go-to lunch carrier, try this craft to give your traditional sacked lunch a woodland facelift, turning the once basic medium into a one-of-a-kind container that all the other kids will envy!
This white-tailed deer has pranced out of the woods to join you for a snack. But you will want to keep the lunchtime chatter to a whisper so that you don’t spook this shy creature into retreating back into his shelter.
Materials
Directions:
- Fold the top of the paper bag down one inch, and crease the bend. Then cut the corners of the folded flap to create an upside-down trapezoid.
- Cut out the shapes from your printout.
- Glue the large cutout of the body to the front of the bag. Make sure not to cover the flap of the bag or you won’t be able to open it.
- Glue the deer’s face onto the flap.
- Glue the antlers to the back of the top of the deer’s head.
- Glue the feet to the bottom of the body.
- Finally, glue the tail to the back of the bag so that it sticks out the side.

