


That’s a Wrap: Discovering Your Gift-Wrapping Style
Photography by Rose Wonder Studio.
I come from a family of dedicated wrappers. My mom’s priority was to use up whatever vaguely Hanukkahesque paper was left in the house as well as scrounge up any big scraps she had salvaged from other gifts. Bows were recycled year after year, their little feet layered with pieces of tape like the tree rings on the trunk of a Douglas fir. She’d buy one of those value packs of clear tape, with each container dispensing approximately seven inches of utility. It was controlled creative chaos, and I lived for it.
My dad, on the other hand, relished the beauty of a monochromatic color scheme. For years, he bought only blue paper. Solid blue. I would sit on the floor of his den and watch enthralled as he made crisp folds, pulling the paper taut in a methodical (and slow) process. He had a weighted tape dispenser with a luxuriously reliable amount of tape in it. He’d tear off each piece with real purpose. His gifts were carefully tucked inside tissue paper and well-maintained boxes. He was very particular about “his” boxes, storing them carefully so they retained their perfect boxlike structure.
My parents’ signature styles of wrapping have become embedded in my memories, and I now appreciate these quirks as much as the gifts inside the paper.
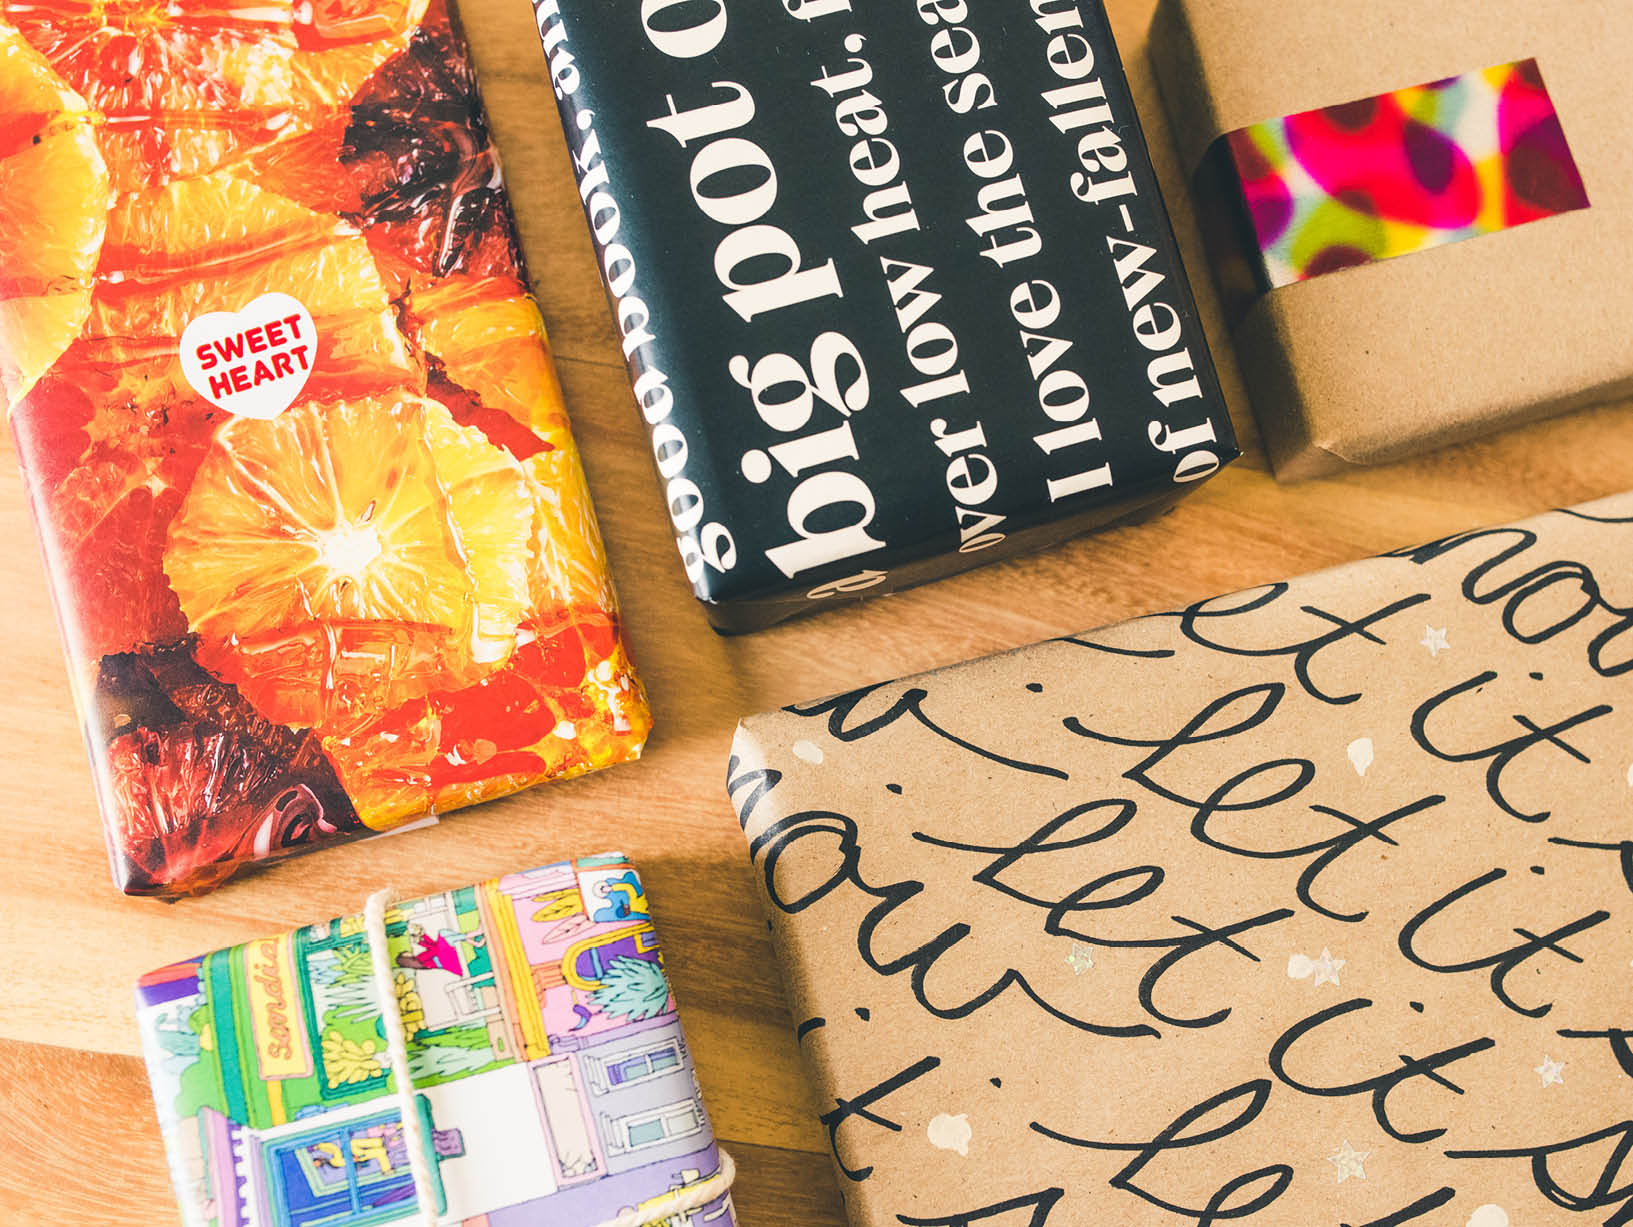
Here are some signature styles to try on for size:
“The Minimalist”
You read my description of my dad and thought, “That’s me!” For a more eco-friendly twist on the solid color approach, try kraft paper. You can also add a geometric touch by using a piece of washi tape, which is paper-based and recyclable.
“The Magazine Designer”
Do you have magazines from three years ago that you’ve been saving for just the right art project? Magazine pages make great wrapping paper, as both text and images can bring your gift to life. Check out the recipe section for large, colorful images. Or go with a financial magazine and let the columns of text shine. A contrasting sticker can add a pop of personality.
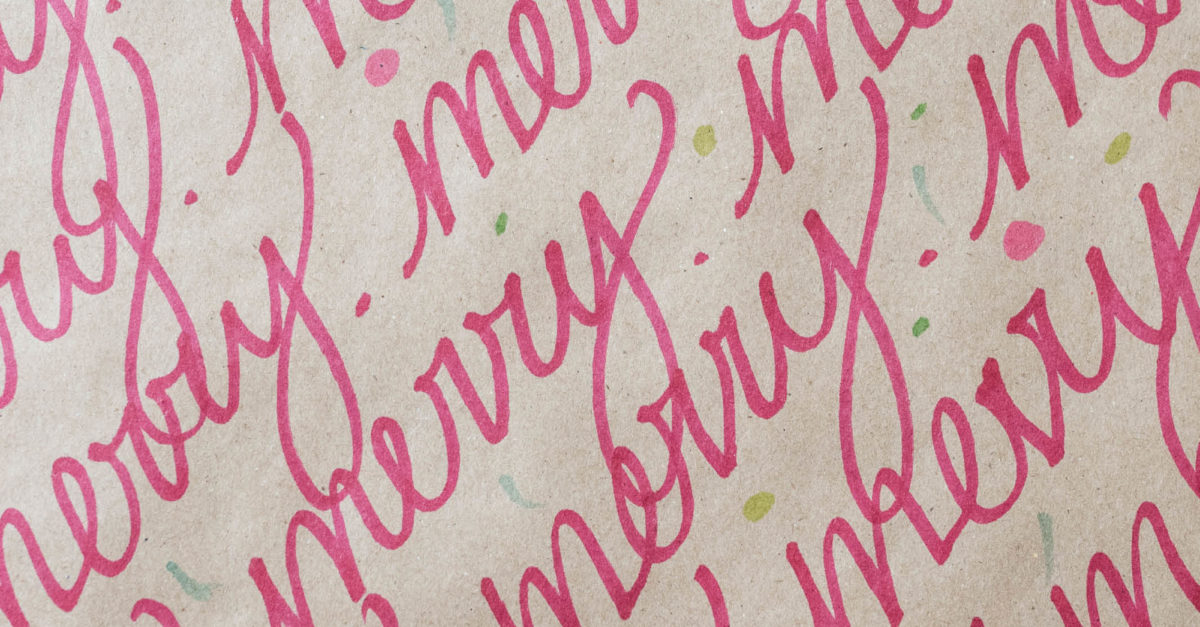
“The Script Superhero”
This one requires a journey back in time to when you learned cursive writing in school. You could also invent your own script font. Choose a phrase like “Let It Snow” or “Happy Holidays,” and start your lettering in the top left corner of blank kraft paper, writing it on the diagonal. If you run out of room on one line, finish the phrase on the next line. Try to keep your letters consistent. Embellish with a white chalk marker or dots of white acrylic paint.
“The Plastic Wrap Genius”
Choose two or three colors of acrylic paint, and squeeze them onto a paper plate or piece of waxed paper. Ball up a piece of plastic wrap, and dip it into your paint, dabbing and stamping some kraft paper with different layers of color.
“The Whimsical Gardener”
Scrapbook paper works best for the base of this DIY wrapping method because it folds more easily than construction paper. Grab a white chalk marker, and draw simple flower doodles in a horizontal line across the page. When it’s time to wrap, turn your paper on the diagonal so the flowers will wrap around your gift. Alternatively, keep your paper perpendicular if you want your flowers to wrap in a straight line.
When it comes to DIY wrapping, the possibilities are limitless. Stamps are a great way to personalize a sheet of kraft paper and can be made with crumpled-up plastic wrap, potatoes, or a sponge cut into shapes. If you have a bundle of twine, experiment by tying pieces of it around your wrapped gift to create a gridlike pattern. Try a sheet of colored paper as your base layer. The comics section of the Sunday newspaper would also make a clever and colorful presentation.
Whatever you choose, your recipient will appreciate the creativity and personalization that go into your DIY wrapping. And you’ll finally have a reason to use that chalk marker you bought to label your jar of rice with. Happy wrapping!